

How To Add An Animation To Powerpoint
Lesson 19: Animating Text and Objects
/en/powerpoint2016/aligning-ordering-and-group-objects/content/
Introduction
In PowerPoint, you tin animate text and objects such equally clip fine art, shapes, and pictures. Animation—or motility—on the slide can be used to draw the audience's attention to specific content or to brand the slide easier to read.
Optional: Download our practise presentation.
Watch the video below to larn more than well-nigh animative text and objects in PowerPoint.
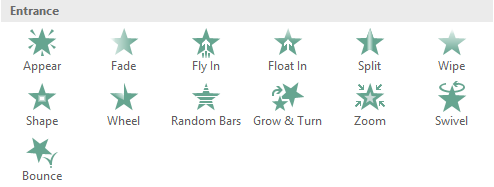
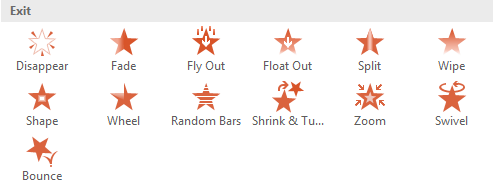
The 4 types of animations
There are several blitheness effects you tin choose from, and they are organized into four types.
- Entrance: These command how the object enters the slide. For example, with the Bounce animation the object will "fall" onto the slide and and then bounce several times.
- Emphasis: These animations occur while the object is on the slide, often triggered by a mouse click. For example, you can set an object to spin when you lot click the mouse.

- Go out: These control how the object exits the slide. For example, with the Fade animation the object will simply fade away.
- Move Paths: These are similar to Accent effects, except the object moves within the slide along a predetermined path, like a circumvolve.

To apply an animation to an object:
- Select the object you lot want to animate.
- On the Animations tab, click the More drop-downwardly arrow in the Animation grouping.

- A drop-down card of animation effects volition appear. Select the desired effect.
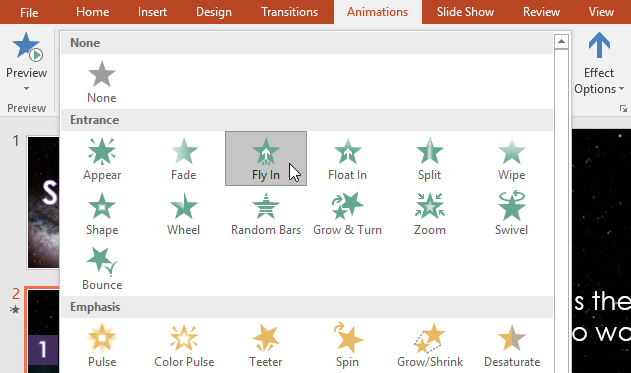
- The effect will apply to the object. The object will take a small number next to it to show that information technology has an animation. In the Slide pane, a star symbol likewise will appear side by side to the slide.
At the bottom of the menu, y'all can admission fifty-fifty more effects.
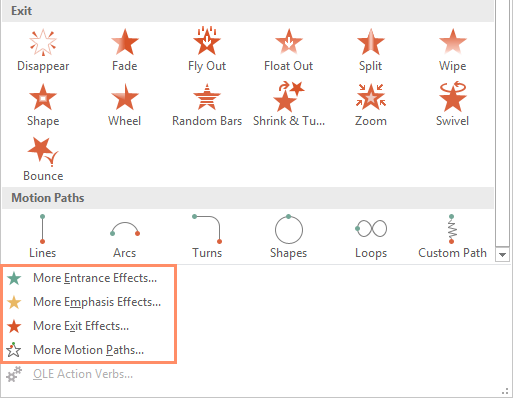
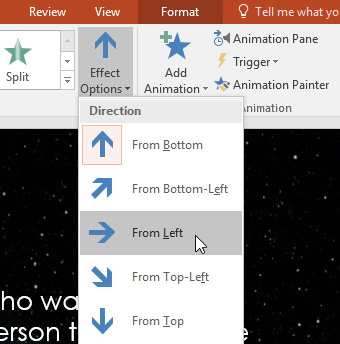
Result options
Some effects will have options yous can change. For example, with the Fly In effect y'all can control which direction the object comes from. These options can exist accessed from the Effect Options command in the Blitheness grouping.
To remove an animation:
- Select the pocket-sized number located next to the animated object.

- Printing the Delete key. The blitheness will be deleted.
Animations are best used in moderation. Adding too many animations can make your presentation look a little lightheaded and can even be distracting to your audience. Consider using mostly subtle animations, or not using animations at all.
Working with animations
To add multiple animations to an object:
If you select a new blitheness from the the menu in the Animation grouping, it will replace the object's current animation. However, y'all'll sometimes want to identify more than than ane animation on an object, similar an Entrance and an Exit upshot. To practice this, yous'll demand to use the Add Blitheness command, which will allow you to go on your current animations while adding new ones.
- Select an object.
- Click the Animations tab.
- In the Advanced Blitheness group, click the Add Animation command to view the available animations.
- Select the desired animation consequence.
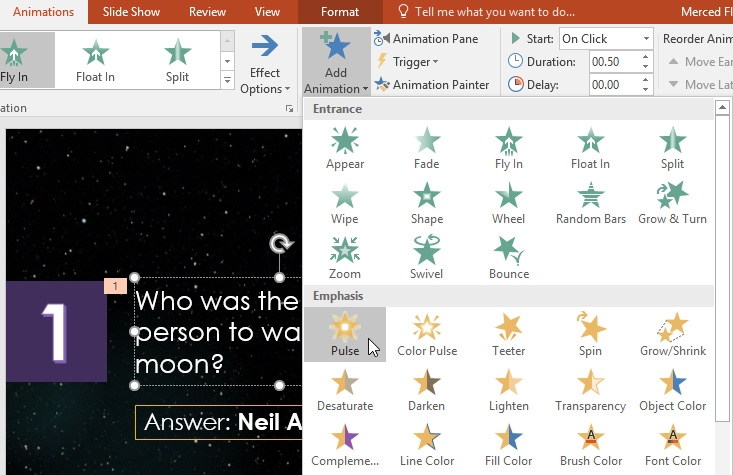
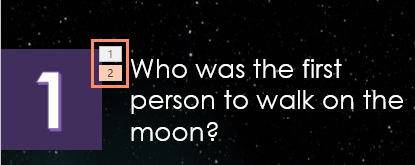
- If the object has more than one consequence, it will take a different number for each effect. The numbers indicate the order in which the effects volition occur.
To reorder the animations:
- Select the number of the event you desire to change.
- From the Animations tab, click the Move Earlier or Move Later commands to alter the ordering.

To copy animations with the Animation Painter:
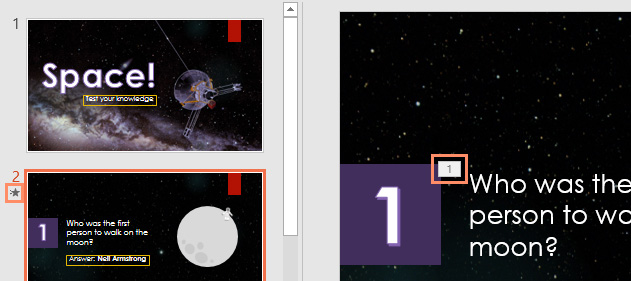
In some cases, you lot may desire to apply the same effects to more than one object. You can do this by copying the effects from one object to some other using the Animation Painter. In our example, we desire to copy an animation from one slide to another because they take similar layouts.
- Click the object that has the effects y'all want to copy. In our example, we'll click our answer text.
- From the Animations tab, click the Animation Painter command.
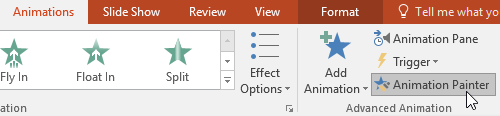
- Click the object you want to copy the effects to. In our example, we'll click the answer text on the next slide. Both objects at present take the aforementioned effect.

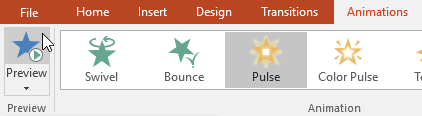
To preview animations:
Whatsoever animation effects you have applied will testify up when yous play the slide show. Yet, you can likewise quickly preview the animations for the current slide without viewing the slide show.
- Navigate to the slide you desire to preview.
- From the Animations tab, click the Preview command. The animations for the electric current slide will play.
The Animation Pane
The Blitheness Pane allows you to view and manage all of the effects that are on the current slide. You can modify and reorder furnishings direct from the Blitheness Pane, which is especially useful when you have several furnishings.
To open up the Blitheness Pane:
- From the Animations tab, click the Animation Pane control.
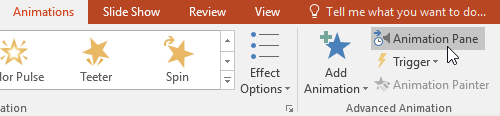
- The Animation Pane will open on the correct side of the window. It will show all of the furnishings for the current slide in the order in which they will announced.
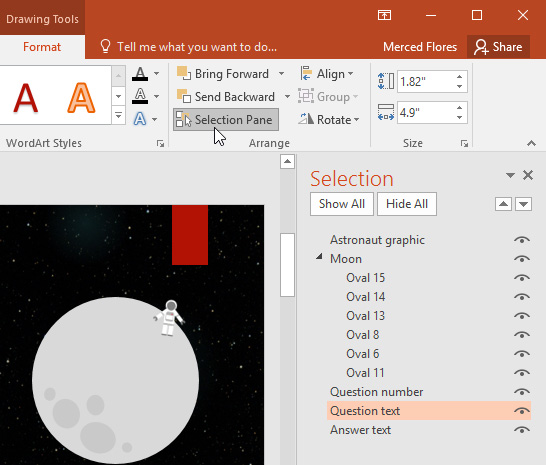
If you have several animated objects, it may aid to rename the objects earlier reordering them in the Animation Pane. You lot can rename them in the Selection Pane. To open up the Selection Pane, click an object, then from the Format tab click Selection Pane. Double-click the name of an object to rename it.
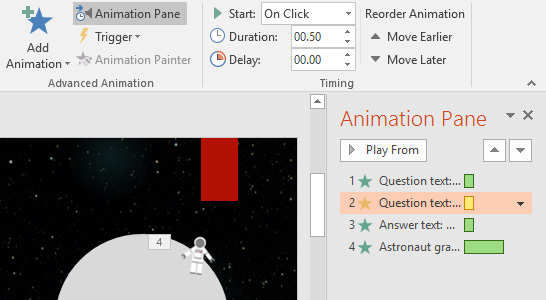
To reorder effects from the Animation Pane:
- On the Animation Pane, click and drag an result upwardly or down.
- The effects will reorder themselves.
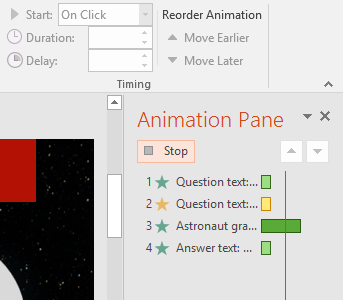
To preview furnishings from the Animation Pane:
- From the Animation Pane, click the Play button.
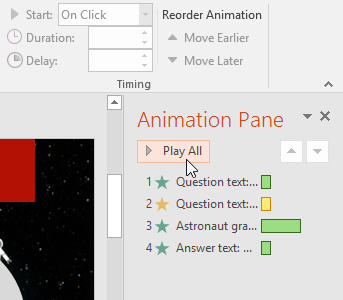
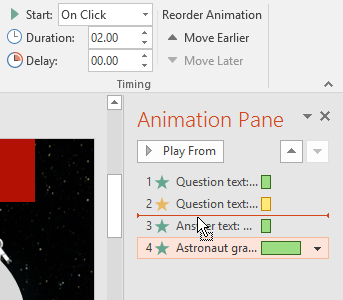
- The effects for the electric current slide will play. On the right side of the Blitheness Pane, y'all volition exist able to see a timeline that shows the progress through each effect.
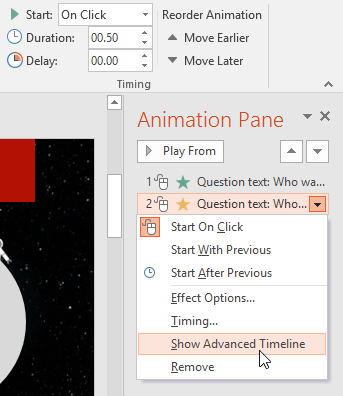
If the timeline is not visible, click the drop-down arrow for an consequence, then select Testify Advanced Timeline.
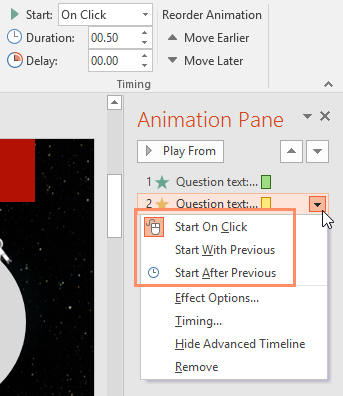
To change an outcome's start pick:
By default, an consequence starts playing when you click the mouse during a slide show. If you have multiple effects, you will demand to click multiple times to showtime each result individually. However, by irresolute the start option for each effect, you lot can accept effects that automatically play at the same time or 1 later on the other.
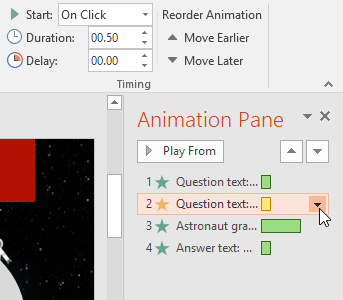
- From the Animation Pane, select an result. A drib-down arrow will appear next to the effect.
- Click the drop-down arrow and select i of the three desired start options. Start on Click will start the consequence when the mouse is clicked, Starting time With Previous will start the effect at the same time as the previous issue, and Showtime Afterwards Previous volition start the effect when the previous effect ends.
When you lot preview the animations, all of the effects will play through automatically. To exam effects that are set to Start on Click, you volition need to play the slide show.
The Event Options dialog box
From the Animation Pane, you lot can access the Effect Options dialog box, which contains more than advanced options you lot can employ to fine melody your animations.
To open the Event Options dialog box:
- From the Animation Pane, select an effect. A drop-down arrow will announced next to the consequence.
- Click the drop-downward arrow, then select Effect Options.
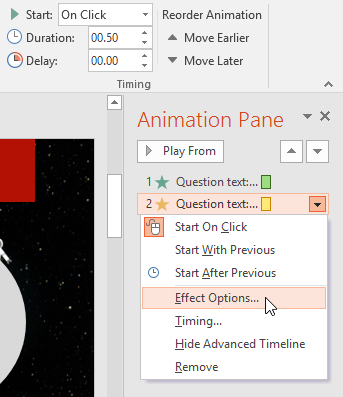
- The Effect Options dialog box will announced. Click the drib-downward menus and select the desired enhancement. You can add a sound to the animation, add an result afterwards the animation is over, or animate text in a different sequence.
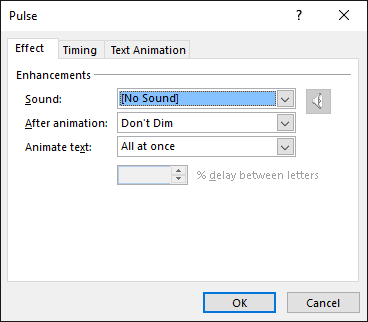
Some effects have additional options you can change. These will vary depending on which effect you accept selected.
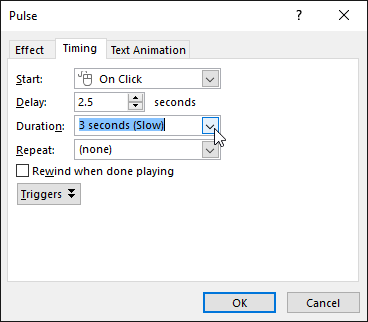
To change the issue timing:
- From the Consequence Options dialog box, select the Timing tab.
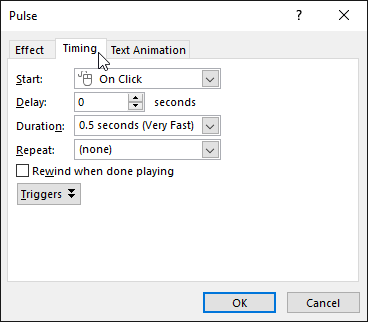
- From hither, you can add a filibuster before the effect starts, change the elapsing of the effect, and control whether the outcome repeats.
Challenge!
- Open up our practise presentation. If you already downloaded our presentation in order to follow along with the lesson, exist certain to download a fresh re-create.
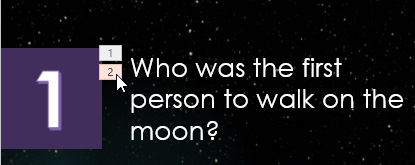
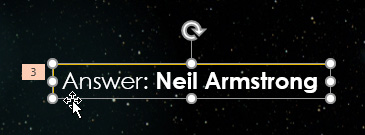
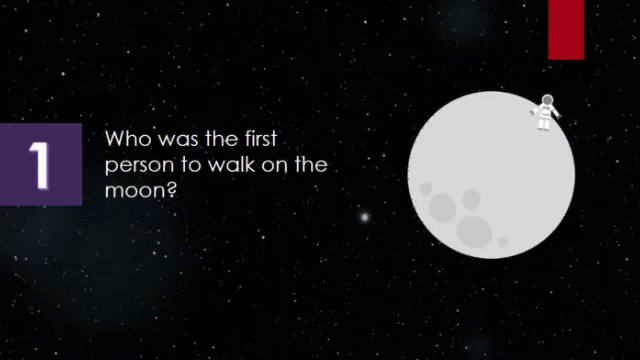
- On slide 2, select the text box that contains Reply: Neil Armstrong, and add a Pulse animation from the Accent group.
- In the aforementioned text box, add a Wipe animation from Entrance grouping.
- Change the Event Options so it wipes From Left.
- Reorder the animations so the Wipe animation will happen first.
- Change the Offset options for the Pulse animation so it starts After Previous.
- Use the Animation Painter to copy your animations to the Answer: Mercury text box on slide iii.
- Remove the animations from the text box on slide 3 containing What planet is closest to the sun?
- When y'all're finished, play your presentation. Slides two and 3 should look something like this:
/en/powerpoint2016/inserting-videos/content/
Source: https://edu.gcfglobal.org/en/powerpoint2016/animating-text-and-objects/1/
Posted by: goodefifery.blogspot.com
0 Response to "How To Add An Animation To Powerpoint"
Post a Comment